Struggling with tired-looking eyes? Discover the instant glow-up secret for brightening deep-set eyes! #DeepSetEyes #MakeupTips #EyeMakeup
Explanation in video
Tired of Looking Tired? This Makeup Artist Trick Will Brighten Your Deep-Set Eyes!
Hey everyone, John here! And with me is my wonderful assistant, Lila.
Lila: “Hi everyone!”
John: Today, we’re diving into a little beauty secret that can make a huge difference, especially if you have what are known as ‘deep-set’ eyes. Not to fret, my fellow deep-set friends, because we’ve got a fantastic tip that makeup artists swear by to make your eyes look instantly brighter and more rested. Sound good?
Lila: “It sounds amazing, John! But first, for those of us who are complete beginners, what exactly are deep-set eyes?”
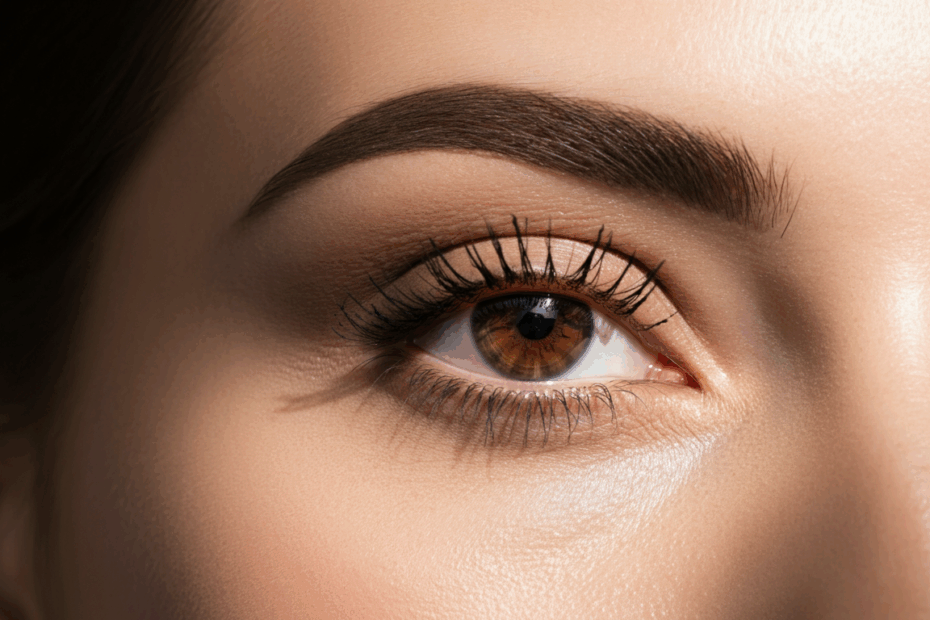
What in the World are Deep-Set Eyes?
John: That’s a perfect starting question, Lila! Imagine a window on a house. Some windows are pretty much flat against the wall, right? Well, deep-set eyes are kind of like windows that are set further back into the wall of the house. This means the brow bone – that’s the bone right under your eyebrow – might seem a little more prominent, and your actual eyeballs sit a bit further back in your skull, or eye socket.
Lila: “Oh, I see! So the brow bone sort of sticks out a bit more, and the eyes are nestled deeper in?”
John: “Exactly! It’s a beautiful and often striking eye shape. Think of celebrities like Keira Knightley or Taylor Swift; they have classic deep-set eyes. It’s not a good or bad thing, just one of the many lovely ways eyes can be shaped.”
The Shadowy Side of Deep-Set Eyes (And Why It’s Not Your Fault!)
John: Now, because the eyes are set further back, the brow bone can sometimes cast a bit of a shadow over the eye area, especially in the inner corners or even across the lid. It’s like how a porch overhang can shade the front door. This can sometimes make you look a little more tired than you actually feel, or make dark circles seem more pronounced, even if you’ve had a great night’s sleep!
Lila: “Ah, so it’s the natural shape creating those shadows, not necessarily lack of sleep or anything else?”
John: “Precisely! While things like sleep and hydration are super important for everyone’s eye area, the inherent structure of deep-set eyes means they’re naturally prone to a bit of shadowing in certain spots. But don’t worry, there’s a super simple makeup trick to counteract this!”
The Magic Wand: Strategic Concealer to the Rescue!
John: The big secret, folks, is all about strategic concealer placement. It’s not about piling on tons of product, but about putting the right kind of concealer in exactly the right spots to bring light forward and erase those shadows.
Step 1: Choosing Your Concealer Weapon
John: First things first, you need the right tool for the job. Not all concealers are created equal, especially for the delicate under-eye area and for brightening.
- Texture is Key: You’ll want something that’s hydrating and blendable. A liquid or creamy concealer is often best. Avoid very thick, dry, or matte formulas, as these can settle into fine lines or look cakey, especially in an area that already has some natural contours.
- The Right Shade: This is crucial. For brightening shadows, makeup artists often recommend a concealer that is one to two shades lighter than your foundation or natural skin tone. Some also swear by concealers with a slight peachy or pink undertone to help neutralize bluish or purplish shadows. This is where color correctors can come in handy.
Lila: “Hold on, John! You mentioned ‘color correctors.’ That sounds a bit technical. What are those, and how are they different from a regular concealer?”
John: “Excellent question, Lila! Think of it like this: regular concealer is like trying to paint over a dark mark on a wall with just a lighter shade of paint. You might still see the mark underneath. A color corrector, on the other hand, is like using a special primer first. For dark under-eye circles, which often have a blue or purple tinge, a peachy or salmon-toned corrector helps to neutralize those specific colors before you put on your regular concealer. So, you might apply a thin layer of color corrector first, let it set, and then apply your skin-toned or slightly lighter concealer on top. It helps the concealer do its job even better!”
Lila: “So, color corrector first to cancel out the dark color, then regular concealer to match the skin and brighten? Got it!”
Step 2: The “Magic Triangle” – Where to Place Your Concealer
John: Now for the game-changing part! Instead of just swiping concealer all over your under-eye area, we’re going to be very precise. The main goal is to bring light to the deepest, most shadowed parts.
Here’s what makeup artists suggest for deep-set eyes:
- The Inner Corner Deep Dive: This is often the darkest spot for deep-set eyes. Place a small dot or a tiny swipe of concealer right in that inner corner, where your eye meets the bridge of your nose. This is often where the tear trough (Lila: “The what now, John?”) begins.
- Slightly Up and Out: From that inner corner dot, you can extend the concealer just a tiny bit upwards towards the inner part of your brow, almost along the side of your nose bridge, and also a little bit outwards along the very beginning of that tear trough line. Think of a very small, inverted triangle with the point facing downwards, but focus the product mostly on the inner part.
- Outer Corner Lift (Optional): Some people also find a tiny dab of concealer on the outer corner of the eye, angled slightly upwards towards the temple, can give a nice little lift. Be careful not to bring it too far down, as that can drag the eye down.
John: “Ah, the tear trough! It sounds a bit sad, doesn’t it? It’s simply the groove or hollow that runs from the inner corner of your eye down towards your cheek. On some people, it’s more noticeable and can contribute to that shadowed, tired look. So, lighting up the start of that trough is key!”
What to AVOID: Don’t apply a thick layer of concealer all the way across directly under your lower lash line if you have deep-set eyes and find it creases there. The trick is to focus on the shadowed areas, which are often concentrated more towards the inner part of the eye, rather than applying a blanket of product everywhere.
Step 3: Blend, Blend, Blend!
John: Once you’ve placed your dots of concealer, it’s time to blend. This is just as important as the placement!
- Use a Gentle Touch: The skin around your eyes is super delicate. Use your ring finger (it has the gentlest touch), a small fluffy concealer brush, or a damp mini beauty sponge.
- Pat, Don’t Rub: Gently pat or tap the concealer into your skin until it melts in and the edges are seamless. Rubbing can irritate the skin and just move the product around instead of blending it.
- Focus on the Edges: Make sure the edges of where you applied concealer are beautifully diffused into your skin so there are no obvious lines.
Lila: “So, the idea is to make it look like the light is naturally coming from those areas, not like there’s a blob of makeup sitting there?”
John: “You’ve hit the nail on the head, Lila! It’s all about creating an illusion of brightness and smoothness, making those deeper-set areas appear to come forward slightly.”
Step 4: Set It (Lightly!)
John: If you find your concealer tends to crease, you can set it with a very light dusting of translucent setting powder. Use a small, fluffy brush and apply sparingly, focusing only where you applied the concealer. Too much powder can look dry and emphasize lines.
Bonus Tips for Bright-Eyed Radiance
John: While strategic concealer is the star, here are a couple of extra little things that can help make deep-set eyes pop:
- Highlight the Brow Bone: A touch of subtle, shimmery (not glittery!) highlighter right under the arch of your eyebrow can lift the eye area.
- Bright Inner Corner Eyeshadow: Similar to the concealer trick, a dab of light, shimmery eyeshadow in the very inner corner of your eye can open things up beautifully.
- Curl Those Lashes: Curling your eyelashes upwards can really open up your eyes and make them look bigger and more awake.
- Skincare Matters: Don’t forget good skincare! Using a hydrating eye cream regularly can keep the delicate skin plump and smooth, making concealer apply better. Look for ingredients like Vitamin C for brightening or peptides for firmness.
John’s Thoughts
John: You know, it’s funny how such a small change in where you put a product can make such a big difference. For years, I just slapped concealer under my eyes and hoped for the best! Learning about targeting those specific shadow points for deep-set eyes is a real ‘aha!’ moment. It’s not about hiding, but about smart illuminating.
Lila’s Perspective
Lila: “I always thought concealer was just for covering blemishes! It’s really cool to learn how it can be used to play with light and shadow like this. The idea of the ‘tear trough’ and focusing on the inner corner makes so much sense now that you’ve explained why deep-set eyes can look shadowy there. I’m definitely going to pay more attention to where I put my concealer now, even if my eyes aren’t super deep-set – the principles of brightening still apply!”
John: “Exactly, Lila! Well, that’s our deep dive into making deep-set eyes look brighter and more rested. We hope this tip helps you feel even more confident and radiant. Let us know if you give it a try!”
This article is based on the following original source, summarized from the author’s perspective:
This Tip Makes Deep-Set Eyes Appear Instantly Brighter
& Well Rested