Confused by Makeup? Let’s Break Down Bronzer vs. Contour!
Hello everyone, John here! Welcome back to the blog where we make tricky topics simple. Today, we’re diving into the world of makeup. If you’ve ever watched a beauty tutorial online and felt your head spin, you’re not alone! Two products that often cause a lot of confusion are bronzer and contour. They look similar in the package, but they do completely different jobs.
My wonderful assistant, Lila, is here with me today. She’s also new to this, so she’ll be asking the questions we all have.
Lila: Hi John! I’m definitely confused. I have one of those brownish powders, but I have no idea if it’s a bronzer or a contour, or what I’m even supposed to do with it!
That’s a perfect place to start, Lila! Let’s clear it all up. By the end of this, you’ll understand the difference and know exactly how to use each one to feel your best.
What’s Bronzer? Think Sunshine in a Compact
Let’s start with bronzer. The easiest way to think about bronzer is to imagine where the sun would naturally kiss your face on a bright, sunny day. Bronzer is designed to mimic that beautiful, warm glow.
Its main job is to add warmth and life to your complexion. When we apply foundation, our face can sometimes look a bit flat or one-dimensional. Bronzer brings back that healthy, sun-touched look without you having to spend hours in the sun (which is great for your skin’s health!).
Here’s what to look for in a bronzer:
- Color: Bronzers have warm undertones. Think golden, coppery, or reddish-brown colors. They are meant to look like a real tan.
- Finish: They often have a little bit of shimmer or a satin finish to catch the light and add to that “glowy” effect. However, you can find matte bronzers too if you prefer a less shiny look.
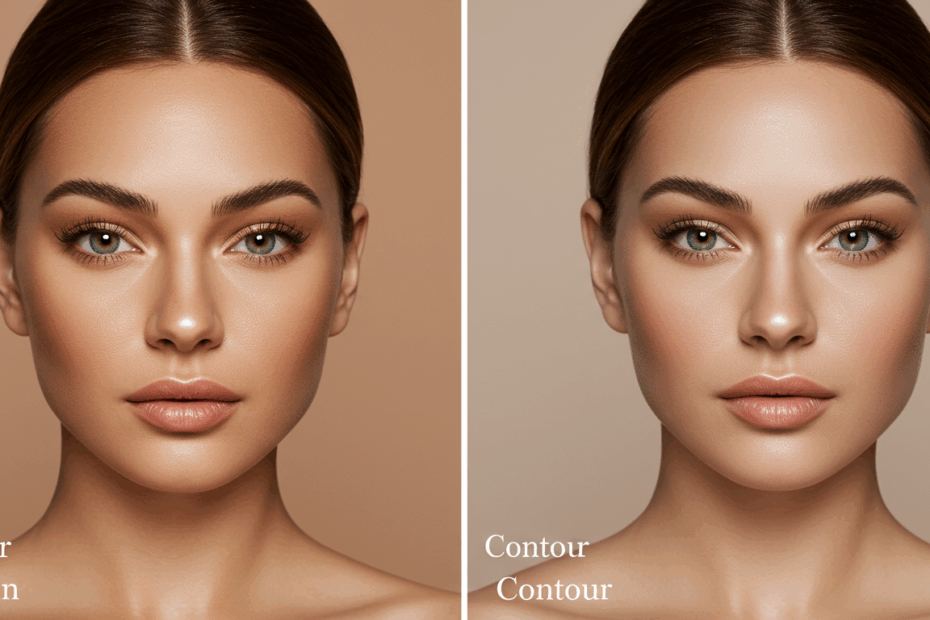
What’s Contour? It’s All About Creating Shadows
Now, let’s talk about contour. If bronzer is sunshine, then contour is shadow. Its purpose is completely different. Contour is used to sculpt and define the natural structure of your face.
Think of it like an artist drawing a portrait. To make a round circle look like a 3D sphere, the artist adds shading. Contour does the same thing for your face. By placing a darker shade in specific areas, you can create the illusion of shadows, making your cheekbones look higher, your jawline sharper, or your nose appear slimmer.
Lila: Okay, that makes sense! But you mentioned bronzers are warm-toned. What color should a contour be?
Great question, Lila! Since contour is meant to mimic natural shadows, it needs to look like a real shadow. Have you ever noticed the color of a shadow on a cloudy day? It’s not orange or golden; it’s more of a grayish or neutral brown.
So, here’s what to look for in a contour product:
- Color: Contour products have cool or neutral undertones. They lean more towards gray, taupe, or neutral brown shades. Using a warm, orangey bronzer to create a shadow will just look unnatural.
- Finish: Contour should always, always be matte. Shadows aren’t shimmery, so your contour product shouldn’t be either. A sparkly shadow would look very strange!
The Key Differences: A Super Simple Guide
Let’s put it all side-by-side so it’s crystal clear.
BRONZER is for WARMING.
- Purpose: To make your face look sun-kissed and glowy.
- Color: Warm, golden, or reddish-brown.
- Finish: Often has shimmer, but can be matte.
- Placement: On the high points of your face where the sun would hit.
CONTOUR is for SCULPTING.
- Purpose: To create shadows and define your facial features.
- Color: Cool-toned or neutral browns and taupes.
- Finish: Always matte. No shimmer!
- Placement: In the hollows and areas you want to recede.
How to Apply Bronzer (The “3” Method)
Applying bronzer is easy once you know where it goes. Grab a big, fluffy brush—this will help you get a soft, blended look rather than a harsh stripe.
Imagine drawing the number “3” on both sides of your face:
- Start at the top of your forehead, near your hairline.
- Sweep the brush down and across your cheekbone.
- Bring it back and sweep it along your jawline, finishing at your chin.
You can also dust a little bit across the bridge of your nose and on your chin. Remember, these are the spots the sun naturally tans first. The key is to blend, blend, blend!
How to Apply Contour (Finding Your Hollows)
For contour, you’ll want a smaller, more precise brush, maybe one that’s a bit denser or angled. This gives you more control over where you place the shadow.
Lila: You said to put contour in the “hollows” of the cheeks. How do I find those? My face just feels… like a face!
Haha, I totally get it, Lila. Here’s a super easy trick: make a “fish face” in the mirror. Suck in your cheeks! The deep, hollowed-out part that appears? That’s exactly where your contour goes. Start from near your ear and blend it forward, stopping about midway towards the corner of your mouth.
Other great places to add a touch of contour are:
- Along your hairline: This can make your forehead appear a bit smaller.
- Down the sides of your nose: This can make it look slimmer.
- Under your jawline: This creates a sharper, more defined look.
Again, the most important rule is to blend until there are no harsh lines. You want a soft, believable shadow, not a muddy stripe.
Can You Use Them Together?
Absolutely! In fact, they work beautifully together. Most makeup artists use both.
First, you contour to define your bone structure. Then, you apply bronzer to bring warmth and glow back to the face. The contour creates the shape, and the bronzer makes it look healthy and natural. Just be sure to apply them to their correct, separate areas—don’t just layer them on top of each other all over.
A Few Final Thoughts from Us
John: At the end of the day, makeup is supposed to be fun. These are just guidelines to help you get started. Don’t be afraid to play around and see what makes you feel confident and happy. There’s no right or wrong, only what you love.
Lila: This was so helpful! I finally understand why that one powder I bought looked a bit orange when I tried to “sculpt” my cheeks. It was clearly a bronzer! I feel much more prepared to give this a real try now. It’s not as intimidating as I thought!
We hope this guide has helped you too. Happy blending!
This article is based on the following original source, summarized from the author’s perspective:
We Asked So You Don’t Have To: What’s The Difference Between
Bronzer & Contour?